The first time I tasted a really good pour over, I thought my coffee beans were defective. There was a clear, bright raspberry note — not vaguely fruity, actually raspberry — followed by something like dark chocolate and a clean, dry finish. I'd been drinking coffee for fifteen years and had never tasted anything like that. I asked what machine it came from, and the barista pointed to a small ceramic dripper sitting on top of a glass jug.
That moment is why pour over coffee has a cult following. Done well, it's the most expressive way to brew coffee at home — the method that gets closest to the flavor that was actually in the bean. It's also more approachable than its reputation suggests. You don't need lab equipment or a barista certificate. You need a few simple tools, some good coffee, and about ten minutes.
This guide covers everything: what pour over is, why it works, which dripper to start with, and a step-by-step method you can use this morning.
What Is Pour Over Coffee?
Pour over is a manual brewing method where you pour hot water over ground coffee held in a filter, allowing it to drip through into a vessel below. That's it. No pump, no pressure, no electricity required. Just gravity, hot water, and a little technique.
The magic is in the filter. Unlike French press (which uses a metal mesh and allows oils and fine particles through), pour over uses paper or cloth filters that catch virtually everything except dissolved coffee solids. The result is a clear, clean cup with no sediment and no greasiness — a "washed" style that lets you taste the coffee's true character without interference.
The reason pour over unlocks so much flavor is control. By pouring water over the grounds in stages, you can influence how evenly the coffee extracts. A careful, even pour extracts consistently from every particle. An uneven pour — all at once, or concentrated in one spot — creates channels where water rushes through without extracting, while other areas over-extract. The difference in the cup is dramatic.
Why Pour Over vs Other Methods?
Different brewing methods suit different things. Here's where pour over shines and where it falls short:
Pour over is best for: Clean, nuanced, complex flavors — particularly from single-origin coffees and light-to-medium roasts. If you're spending money on specialty coffee from a quality roaster, pour over is how you taste everything they put into it. Fruit notes, floral aromas, delicate sweetness — these come through clearest in pour over.
Pour over is not ideal for: Lazy mornings, high-volume brewing (more than 2–3 cups at once gets tedious), or people who specifically love a heavy, oil-rich body in their cup. If you want bold and thick rather than bright and clean, French press is probably a better fit.
Compared to drip machines: A $20 pour over dripper will generally outperform a $200 automatic drip machine, because you're controlling the water temperature and distribution manually — two things most automatic drip machines do badly. The tradeoff is that you're standing there actively brewing rather than pressing a button.
Equipment You Need
Good news: the basic equipment is cheap and simple. Here's what you actually need:
Essential Equipment
- Pour over dripper — the main attraction (covered in detail below)
- Filters — paper filters specific to your dripper; usually come in boxes of 40–100
- Kettle with gooseneck spout — this matters more than most beginners expect; a standard kettle pours too fast and too imprecisely for good pour over. A gooseneck gives you control over flow rate and placement. An electric gooseneck with temperature control (like the Fellow Stagg EKG or Bonavita 1-liter) is the gold standard
- Burr grinder — non-negotiable; see our burr grinder guide for options at every price point
- Scale — a simple kitchen scale accurate to 1g is fine; scales accurate to 0.1g are better for dialing in
- Server or mug — the dripper sits on top; either a dedicated glass server or your favorite mug works
- Timer — your phone works perfectly
Nice-to-Have
- Thermometer — if your kettle doesn't have temperature control
- WDT tool — a fine needle tool for breaking up clumps in the grounds (helps with light roasts)
- Dosing cup or paper filter prep stand — minor quality-of-life improvements
The Most Important Equipment Choice
If you're upgrading one thing, make it the grinder. A $15 V60 dripper + a $170 Baratza Encore ESP will outperform a $100 dripper + a blade grinder in a blind taste test every single time. The grinder matters more than the dripper.
5 Pour Over Dripper Reviews
There are dozens of pour over drippers on the market. Here are the five worth serious consideration:
1. Hario V60 — The Classic, For Good Reason

The Hario V60 is the dripper that launched a thousand specialty coffee shops. The distinctive 60-degree cone (hence "V60"), single large hole, and spiral ribs on the interior walls combine to give you maximum control over flow rate and brew time. If you slow your pour, extraction increases; speed it up, extraction drops. That responsiveness is exactly what makes the V60 the preferred training tool for baristas — and exactly what makes it slightly more demanding for beginners.
The V60 comes in ceramic, glass, plastic, and metal versions. The ceramic version holds heat best and gives a small advantage in brew consistency. The plastic version is shockingly good (professionals use it in competition) and very forgiving to handle. The glass version looks stunning but cools quickly.
Paired with thin Hario paper filters (which add less flavor than some thicker filters), the V60 produces a bright, clean, nuanced cup. It's the reference standard for pour over for a reason.
Pros
- Maximum control over extraction
- Produces the clearest, most nuanced cups
- Vast community and recipe library
- Multiple materials and sizes (01, 02, 03)
- Widely available filters
Cons
- Less forgiving than Kalita Wave for beginners
- Requires consistent, controlled pouring technique
- Single hole drains vary slightly by brew
2. Chemex — Best for Multiple Cups

The Chemex is the pour over dripper in the Museum of Modern Art's permanent collection, which tells you something about both its design legacy and the kind of people who use it. The hourglass-shaped glass carafe is the dripper and server in one — no separate vessel needed.
What makes the Chemex distinctive is its proprietary filters, which are 20–30% thicker than standard V60 paper. That thickness removes more oils and fine particles, producing a remarkably clean, light-bodied cup — sometimes almost tea-like in clarity. It's polarizing: some love it, some find it strips too much body.
For brewing two or more cups, the Chemex is genuinely excellent. The large capacity makes volume brewing easy, and since everything stays in the carafe, it doubles as a decanter for serving at the table.
Pros
- Beautiful design — looks like art on your counter
- Great for 2–4 cup brewing
- Produces extremely clean, light-bodied coffee
- All-in-one brew and serve
Cons
- Thick filters can be hard to find and are more expensive
- Glass carafe can break; no plastic version
- Strips body — not great for full-bodied coffees
- Awkward to clean inside the narrow neck
3. Kalita Wave — Most Forgiving for Beginners
If the V60 is a sports car — responsive, rewarding, demanding — the Kalita Wave is a well-tuned daily driver. The flat-bottomed design with three small drain holes (instead of V60's single large hole) creates a more even extraction environment where small inconsistencies in pouring technique matter less.
The distinctive wavy filters hold the grounds away from the dripper walls, promoting even water flow and more consistent extraction. The result is a more forgiving brew with a slightly rounder, more balanced body compared to the V60. You'll have a harder time making a truly bad cup, and a beginner will get great results faster.
This is the dripper I recommend to new pour over brewers 90% of the time. You can upgrade to a V60 later once your technique improves, but you'll make great coffee from day one with the Kalita.
Pros
- Most forgiving dripper for beginners
- Flat bottom and three holes promote even extraction
- Balanced, sweet cup profile
- Available in stainless steel (very durable)
Cons
- Wavy filters are more expensive and harder to find locally
- Slightly less "expressive" than V60 at peak technique
- Stainless version loses heat faster than ceramic
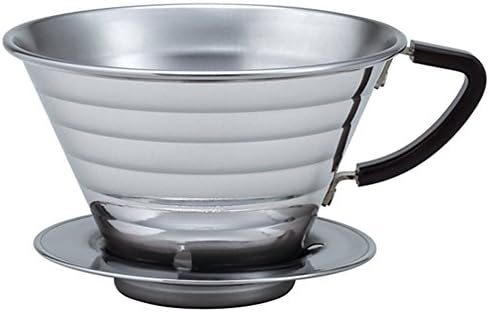
4. Melitta Single Cup Dripper — Best Budget Option

The Melitta is where pour over started — literally. Melitta Bentz invented paper filter coffee in 1908. The modern Melitta pour over cone is about as cheap as a dripper gets ($5–8), and it works surprisingly well.
The ribbed interior walls and small off-center hole slow the flow rate enough that even aggressive pours produce decent extraction. The grind has to be slightly coarser than V60 to prevent over-extraction (because the hole is smaller), but once you've dialed that in, the Melitta is a legitimate pour over dripper that produces a clean, balanced cup.
Use standard #2 or #4 Melitta paper filters (widely available at any grocery store) and you're set. This is the perfect "try pour over before buying a V60" option, or a great travel dripper that won't hurt if it breaks.
Pros
- Extremely affordable
- Filters available everywhere
- More forgiving than V60 due to slower drain
- Lightweight and portable
Cons
- Less control and nuance than premium drippers
- Inconsistent hole size in cheaper units
- Plastic — not as attractive on the counter
5. Fellow Stagg [X] Dripper — Best Premium Option

Fellow's Stagg [X] is the premium end of pour over drippers, designed for people who take their technique seriously. The double-walled stainless steel exterior retains heat significantly better than ceramic or single-wall metal, which matters when you're pouring over a long 3–4 minute brew. The ratio-aid markings on the interior help you track how much coffee you've brewed without a scale — a nice touch.
The proprietary Stagg [X] filters are quite good, and the dripper itself produces a well-rounded cup with more body than the V60 — more forgiving of technique variations while still producing complex, clean results. The form factor is also beautiful in a very Fellow-design way: matte black, geometric, extremely photogenic.
At $55–65, it's a luxury item. The Kalita Wave makes equally good coffee for half the price. But if you're already buying a Fellow gooseneck kettle and want everything to match (and don't mind paying for aesthetics), the Stagg [X] is genuinely excellent.
Pros
- Excellent heat retention with double walls
- Forgiving but still produces nuanced cups
- Stunning design
- Ratio-aid markings inside carafe version
Cons
- Expensive for a dripper
- Fellow-proprietary filters (slightly harder to find)
- Heavy heat retention can slow coffee cooling — minor nitpick
Step-by-Step Pour Over Brewing Guide
This is a recipe for a standard single-cup V60 or Kalita Wave pour over. The principles apply to all drippers; adjust quantities for larger brews.
Base Recipe
Coffee: 20g (about 4 tablespoons)
Water: 300g (300ml) at 93–96°C (199–205°F)
Ratio: 1:15 coffee to water
Grind size: Medium — like coarse table salt
Total brew time: 3:00–3:30
Step 1: Boil and Prepare Water (T-3 minutes)
Bring your water to a boil, then let it sit for 30 seconds off the boil (or use a temperature-controlled kettle set to 94°C). While the water heats, weigh out 20g of whole-bean coffee.
Step 2: Rinse the Filter
Place a paper filter in your dripper, set it on your vessel, and pour about 100g of hot water through it. This removes papery taste from the filter and preheats the dripper and vessel. Discard the rinse water.
Step 3: Grind the Coffee
Grind your 20g of coffee to a medium grind — roughly the texture of coarse table salt. For a V60, you want medium-fine; for a Kalita Wave, slightly coarser. If you don't have a scale, 20g is roughly 4 level tablespoons.
Step 4: Add Grounds and Tare Scale
Add the ground coffee to the wet filter. Give the dripper a gentle shake to level the bed. Place your dripper-on-vessel on the scale and tare to zero. Start your timer.
Step 5: The Bloom Pour (0:00–0:45)
Pour 40–60g of water (2–3x the coffee weight) slowly over all the grounds. Start in the center and move outward in small concentric circles, making sure all grounds are wet. You'll see the coffee swell and bubble — this is CO₂ releasing from freshly roasted coffee, which is called the bloom. Let it sit for 30–45 seconds. If there's no bloom, your coffee is stale.
Step 6: Main Pours (0:45–2:30)
Starting at 0:45, pour in slow, controlled circles to reach 150g total. Let the water level drop until the grounds are almost exposed, then pour again to 250g. Let it drop again, then pour to 300g. The exact timing varies by dripper, but aim to finish all pouring by 2:30.
Step 7: Drawdown (2:30–3:30)
Once you've added all 300g, let the coffee drain completely. The entire drawdown should finish by 3:00–3:30 from starting the timer. If it finishes faster, grind finer next time. If it takes longer, grind coarser.
Step 8: Taste and Adjust
Let the coffee sit for 30 seconds (it's very hot) and taste it. See the Common Mistakes section below for how to adjust if something's off.
Ratios, Temperatures & Grind Sizes
Coffee-to-Water Ratios
| Ratio | Strength | Example (20g coffee) | Best For |
|---|---|---|---|
| 1:14 | Strong | 20g coffee → 280g water | Dark roasts, bold coffees |
| 1:15 Starting Point | Medium | 20g coffee → 300g water | Most coffees, most people |
| 1:16 | Light | 20g coffee → 320g water | Light roasts, bright coffees |
| 1:17 | Very light | 20g coffee → 340g water | Very light Ethiopian naturals |
Water Temperature
Water temperature affects extraction rate: hotter water extracts more compounds faster. The sweet spot for pour over is 93–96°C (199–205°F) for most coffees. Light roasts benefit from the higher end (95–96°C) because they're denser and harder to extract. Dark roasts can go slightly lower (91–93°C) to avoid bitter over-extraction of compounds that become soluble at high heat.
If you don't have temperature control, bring water to a full boil, then wait 30 seconds — this drops you to approximately 94°C at sea level.
Grind Size Reference
Grind size interacts with everything: too fine and you'll over-extract (bitter, astringent) in the time it takes water to drain. Too coarse and you'll under-extract (sour, weak, watery) because water passes through too quickly.
- V60: Medium to medium-fine — target 2:30–3:30 total brew time
- Kalita Wave: Medium — slightly coarser than V60
- Chemex: Medium-coarse — thick filters slow the pour, so you need coarser grounds to compensate
- Melitta: Medium-coarse — small hole requires coarser grind
Common Pour Over Mistakes (and How to Fix Them)
Problem: Coffee tastes bitter, harsh, or astringent
Cause: Over-extraction — too much dissolved from the coffee.
Fix: Grind coarser, lower your water temperature by 2–3°C, or use less coffee (increase ratio to 1:16).
Problem: Coffee tastes sour, weak, or watery
Cause: Under-extraction — not enough dissolved from the coffee.
Fix: Grind finer, increase water temperature, or use more coffee (tighten ratio to 1:14–1:15). Also ensure your bloom was thorough and all grounds were wet.
Problem: Coffee drains too fast (under 2:30)
Your grind is too coarse. Water passes through before extracting fully. Grind finer by one or two steps and try again.
Problem: Coffee drains too slowly (over 4:00)
Your grind is too fine, or grounds are clogging the filter. Grind coarser. Also check you're not overfilling — the water level shouldn't rise above the filter walls.
Problem: No bloom — coffee barely bubbles
Your coffee is stale. Fresh coffee (roasted within 2–4 weeks, ideally) has abundant CO₂ and blooms vigorously. Old coffee has off-gassed and blooms little or not at all. Buy fresher coffee and store it properly (airtight container, away from light and heat).
Problem: Cup tastes flat and dull despite good technique
Most likely your water. Heavily filtered or distilled water lacks the minerals that facilitate extraction and carry flavor. Coffee extraction actually requires some mineral content (specifically magnesium) in the water. If you're using completely deionized water, you'll get flat, lifeless cups. Use filtered tap water with mineral content of about 75–150 ppm, or use Third Wave Water mineral packs.
The Single Biggest Improvement You Can Make
Beyond technique, the fastest path to better pour over is fresher coffee. Buy directly from a local roaster or mail-order roaster, look for a roast date on the bag (not just a "best by" date), and brew beans 7–21 days post-roast. Stale supermarket coffee with perfect technique will always taste worse than fresh coffee with average technique.
Frequently Asked Questions
Technically no, but practically yes — especially for V60. A standard kettle pours too fast and too imprecisely to properly distribute water over the coffee bed. A gooseneck gives you the control to do the bloom pour and main pours accurately. If you're starting with a Kalita Wave or Melitta, a gooseneck is slightly less critical, but it still helps. Budget gooseneck kettles start around $30–40.
You can, but you'll be leaving a lot of potential on the table. Pre-ground coffee goes stale quickly (within days of grinding, compared to weeks for whole beans), and the supermarket grind size may not match your dripper optimally. The most impactful single upgrade to pour over quality is a burr grinder with fresh beans. That said, a bag of fresh pre-ground coffee from a quality local roaster beats stale whole beans from a supermarket.
Light to medium roasts from single-origin sources work best — they have the most distinctive flavor characters that pour over showcases. Ethiopian coffees (often naturally processed, with fruit and floral notes) and Colombian/Central American washed coffees (clean, balanced, chocolatey) are crowd favorites. Avoid very dark roasts, which have had their subtle flavors roasted away and taste mostly of roast rather than origin.
If you're a complete beginner, start with the Kalita Wave. It's more forgiving and you'll get great results faster. If you've already done some manual brewing and want maximum control and flavor clarity, go V60. Either way, you can't make a bad choice — both are excellent at their price point. The technique you develop on one transfers directly to the other.
Use a larger dripper (V60 02 or Kalita Wave 185 both handle 2-cup brews) or a Chemex 6-cup. Scale your recipe proportionally: for two cups (600g water), use 40g of coffee. The brew process is identical — just extend your pour time slightly and use a larger vessel. Alternatively, brew two separate cups if your dripper is small.
Most likely cause: variable grind dosing, water temperature, or pour timing. The solution is to use a scale (weigh coffee and water, not tablespoons and eyeballed cups), a temperature-controlled kettle, and a timer. Once you standardize all three variables, your cup becomes highly reproducible. Differences between coffees (roast date, origin) are real and expected — but within the same bag, the recipe should be consistent.